
Week 8 has arrived. I'm in Utah and lovin' on my baby granddaughter so I hope this post goes well. It's a bit more this week as it's getting close now. Oh goodness. Who has it figured out? This is really getting tough for me. I want you to keep building and yet don't want to give it away. Are you ready to get started? As always, PLEASE read all the way through first. Get ready, get set, go.
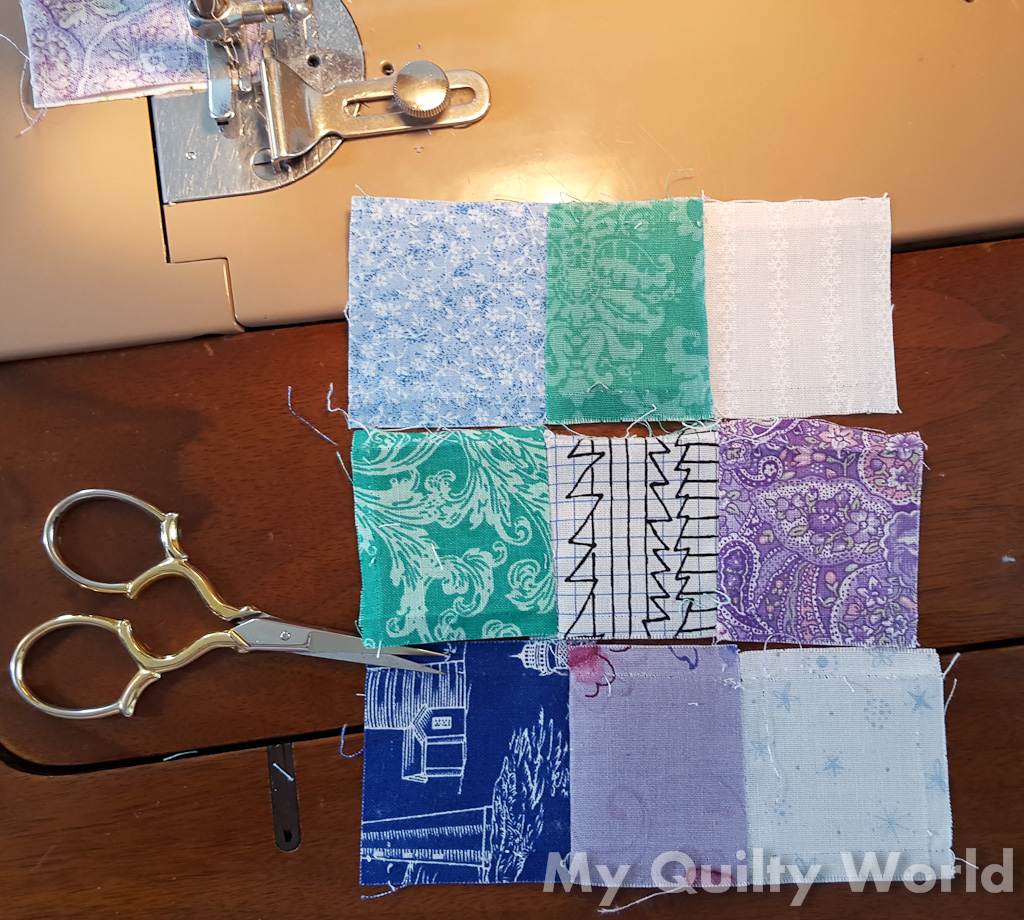
Unit P (make 8):

 Right off the bat we are using reserved "threesies". Yay! These will go together in a snap. From your reserve, pull 8 N/B/N's (12 remain), 8 B/N/P's (0 remain), and 8 N/P/N's (8 remain). Got em?
Here's your layout below:

Stitch those sweet little nine-patches together and this is what you should have:


 Does it measure correctly? Fix now so that your whole clue isn't off. YES, I am serious about making sure your measurements are right. I say it with each unit don't I?
Press, stack and label these units as "P".
Moving on -----
Unit Q (make 8):

 Again with the reserved "threesies". What a great clue, right? Pull 8 P/B/G's (4 remain), 8 N/G/N's (4 remain), and 8 G/N/B's (8 remain). Easy peasy.
Follow the layout below:

Here is your finished unit:


 Do I need to repeat myself here? HAHAHA
Press, stack and label these as "Q".
Yep, we're still going. This has just been too easy so far. It makes all those moments of sewing "threesies" oh so worth it. Wonderful stacks of cute little units.
Unit R (make 8):

 By now you should know the drill. We are in nine-patch central this week. Pull 8 B/G/N's (20 remain), 8 P/N/G's (12 remain), and 8 B/P/N's (8 remain).
Follow the layout to the right. And here is where I fell asleep apparently because I don't have a finished or labeled picture of this unit. I'm sure you can follow it though. Make 8, press, stack and label as "R".
Unit S (make 12):

 Let's go to the cutting table first. No matter which option you have been following in previous clues, this one is a work together the whole way through. EVERYONE cut 20 - 2" x 5" green bricks. These will be used in S and T as well as four going into reserve. (It's getting tight on that green, isn't it?)
Now, pull from reserve these "threesies": 16 G/N/G's (0 remain), 12 N/B/N's (0 remain), and 4 N/G/N's (0 remain). We have cut and pulled for both the S and T units.
Using the layout below, make 12 S units.

Here is your finished unit:


 Measure, press, stack and label as "S".
Set aside for now. With most of the remaining pieces that you have cut and pulled we are going to put together 4 T units.
Unit T (make 4):


 Here is what you should be using on this next clue. There will be FOUR 2" x 5" green bricks remaining. Put them in reserve for later. On the right is your layout for this unit:
Finished block:


 Measure. Still 5"? Nothing has moved today?
Press, stack, and label as "T" unit.
How far in the alphabet are we going to go? It's a mystery. Bwahahaha
Okay, enough with the units today. I want to put some more mini-blocks together so that I feel like I'm getting somewhere. Let's start with something simple.
Mini-Block #6 (make 4):

Using your just made S and T blocks, make 4 little mini-blocks using the layout below. Please, please, please watch the orientation. I KNOW I have two darks in there and I try not to do that, but hey, just like everyone else, my selection is running out.

This mini-block should measure 5" x 9 1/2". Does it?

Press, stack, and label as Mini-Block #6. Set aside.


 From reserve, find your D and E blocks. We are going to make 4 strips that are DEDED. Look at the layout. I laid out all four rows on a design board to attempt to keep the same fabrics from touching. Not 100%, but a valiant effort.
Yep, all 4 rows are webbed together. It's a technique I love AND it allows me to work several things at once as my leader/enders are usually a second webbing such as the very next task in this clue. (Shown in my constant fabrics as I forgot to take this picture the first time round.)

Press, stack and label these as Mini-block #7. Moving on - - - - -
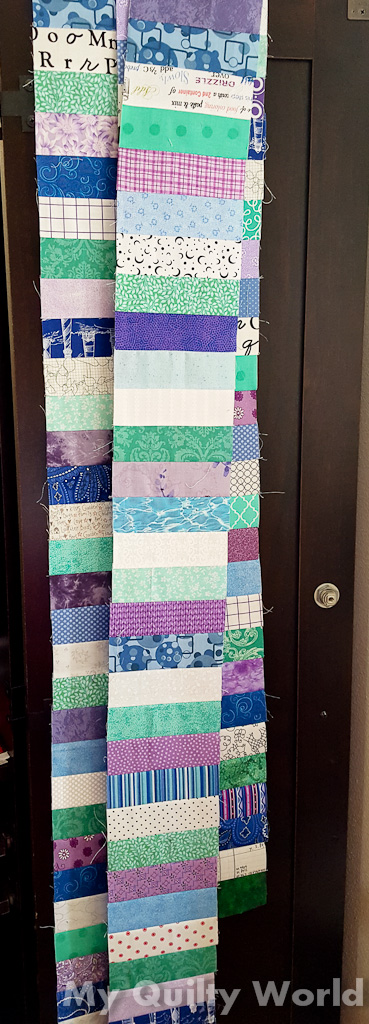
 COMBO STRIPS (make 4): I'm thinking this went super fast -- soooooo go grab those combo blocks. You know -- all 52 of them and while you are at it --- find those 4 - 2" x 5" green bricks I had you set aside in units S & T above. We are going to make 4 long strips with these. Each one will contain 13 blocks and ONE green brick. Starting with green on your combo block and ending in the single green brick. Sew these end to end in the same continuous order to get the result show in the picture. If you look close at the picture on the left, you will see that these are also webbed. Yep, easy to do. Are these sashings? Only time will tell.
Okay -- we NEED to keep moving forward on our blocks. Onto Block B.


 You will need your C, L, M, N O1 and O2 units. You will use all of them. Yep, things are starting to come together now.
 With the layout at the side, put your blocks together. WATCH, WATCH, WATCH. It is easy to turn something the wrong way. I know -- I did it. Your purple needs to run diagonally from upper left to lower right. There should be blue/purple four-patches along the way AND you should spot TWO ribbons. Yep, here they come finally.
 Sew together using the webbing technique shown previously so that your blocks don't get turned on accident. Oh, now it's getting fun. Your blocks should measure 14" square. Oh yay!
 Press, stack, and label these as Block B, not to be mistaken for the single Unit B that you have in reserve. I know. It's required to confuse someone each clue.
And NOW --- for your building pleasure:
Big Block 1 (make 4): It's time to really put something together. Remember Mini-Blocks #1 and #4? You need them now. Lay out as shown with a 1 - 1 - 4.

Sew the three sections together to get 8 units like this.

Using your 8 units above, divide the stack in half and layout two of each together as shown to make the required 4 blocks.

Sew into 4 larger blocks.

No, you are not finished. Now go get those Mini-Blocks #7 that we made above. They will be added to the bottom of our block as so:

And now you have 4 Big Blocks. Press, Stack and Label as Big Block #1. Yep, it's coming together now. I bet you are surprised as well. Pretty sure you thought those A blocks were going to make ribbons. And now, you are wondering -- just where is she going with this? Or, perhaps you have already guessed. Let me know if you have and I can share in your glee.

That's it for this week. I'm loving and playing on my baby girl. I hope this week has been as much fun for you as mine is. Life is good.
Here is what you should have now:
Minimal cut strips --
4 Unit A's together and clearly labeled "A"
1 Unit B together and clearly labeled "B"
8 Unit P's together and clearly labeled "P"
8 Unit Q's together and clearly labeled "Q"
8 Unit R's together and clearly labeled "R"
8 Unit S's together and clearly labeled "S"
8 reserved B/P/B "threesies"
8 reserved N/P/N "threesies"
8 reserved G/B/G "threesies"
8 reserved G/N/B "threesies"
12 reserved P/N/G "threesies"
20 reserved B/G/N "threesies"
4 reserved P/B/G "threesies"
8 reserved B/P/N "threesies"
4 Mini-Block #2's together and clearly labeled "#2"
4 Mini-Block #3's together and clearly labeled "#3"
4 Mini-Block #5's together and clearly labeled "#5"
4 Mini-Block #6's together and clearly labeled "#6"
4 Block A's -- together and clearly labeled
4 Block B's -- together and clearly labeled
4 Big Block #1's together and clearly labeled
4 Combo Strips together
Please post and share on Our Quilt World or From The Studio Facebook groups.
No comments:
Post a Comment