

Happy Halloween!!! Should it be a Trick or a Treat today? Are you just dying to see the finished product? Lucky you -- because today is the day. The big reveal. But first -- a word from our sponsor -- me.
There are four corners, four borders (both inner and outer), four cornerstones, and four side center sections of the top. Let's focus on four important aspects of women. A woman:
Learns daily
Opens herself to new ideas and adventures
Views the world with wonder and
Enriches her life by surrounding herself with family and good friends.
Obviously that shows that we LOVE with every fiber of our being.
Unfortunately there are many women who have to struggle with violence in their lives in one form or another. I was one such woman. Let these Ribbons of Love subtly remind us that we are to be treasured always. To be strong. To help one another. To love ourselves enough to not allow others to do harm to us. We can do it.
I have learned to love myself. It was oh so hard, but it has happened. Now, all I can say is the past 10 weeks have literally flown by. I want to thank everyone for participating in my first mystery and I hope that it has been a pleasant experience for each of you. I have learned a great deal and hope you have as well.
Okay --- let's get this top finished shall we?
Center Medallion (make 1)
You will need your Mini-Blocks #5 and #6 as well as your single little B unit. Yep, I'm sure you've figured out by now that it is the heart of this top.

For the center row, sew two #6's to unit B following the layout here:

For the upper and lower rows, sew one #6 to the right of a #5 as shown with the single purple square in the outer corner. Repeat. All #6's should be attached now.

With the remaining #5's, attach to the opposite side of upper and lower rows to get the layout shown below:

Guess what? It's another 9 patch. Put that sweetheart together. Now stand back and say awwww. Doesn't it look cool? All references to layout of this section need to be made here. Now, set the center medallion aside for now.

In all the following pictures of my constant quilt, the center medallion is different. Please disregard that and refer to the above pictures if you have a question. I made a mistake when doing my own quilt (these pictures are kindly given by Jennifer M.) and I don't want you to think that yours is incorrect.
Corner Blocks (Make 4): It's time to put the corners together. You will need your A,B,C, and D blocks.


Sew these giant four patches together. Simple, simple.
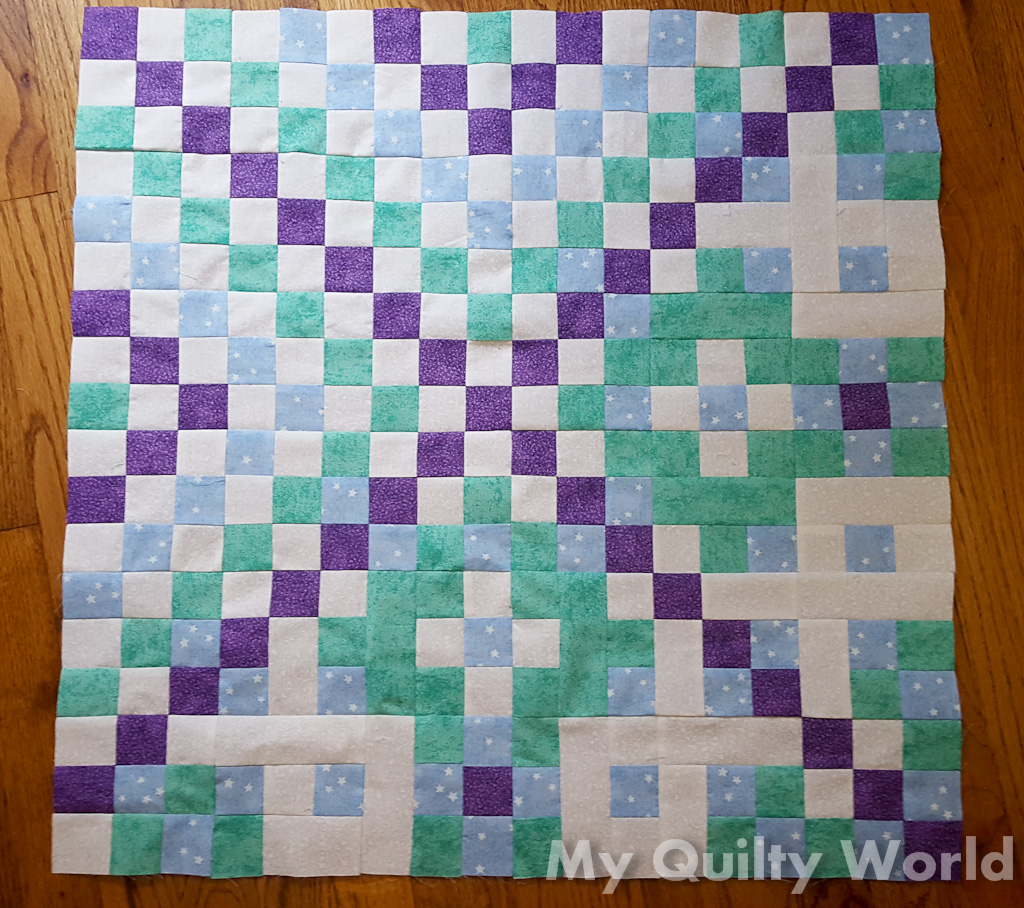
Oh my it's getting close now. Take your Big Block, Corner Blocks and Center Medallion to your layout area. You are now creating a GIANT nine patch. And you should be dang good at them by now. The corners contain the checkerboard area and the Big Blocks are set so that the individual 2" x 5" white and green bricks are on the outer edge, thus creating ribbons all around the center.

Sew this all together. Yep, your center is finished.

Guess what!!! It's time for borders. At this point you can choose your inner border BUT since I had exactly the right amount of neutral strips left, I put them to work. Since we are all working with differing lengths of strips here, I can't tell you exactly how many you will need. My guess is 8 or 9 WOF 2" strips. Sew the strips together however you prefer. I went with the straight seam since I don't have any angle seams in this top and didn't want to start now. Once you have them all sewn together, lay one end of the border strips down the center of your top, keeping ends even and cut.

Bring the new end up to the top and repeat the process to give you your side border strips.


 About a year ago, I figured out that if I just leave the top on the floor (or table if that is what you are using) and move my borders to the side and just pin them on right then, it is oh so much easier than trying to pin them after picking up the top.
Once you have moved them each to the side, pin and stitch the side inner borders to the top.

BEFORE you press your seams out and ONLY because our top and bottom borders are going to have 2" cornerstones, we can also measure those pieces now as well. Laying your border strips across the center and going from side to side, repeat the process as before to give you your top and bottom borders.

Oh darn, you have to cut. I'm pretty sure you have enough purple left to cut 4 - 2" squares. Attach these to all four ends of your upper and lower border strips.

Now attach those to the upper and lower edges of your top. What are we missing?


 Oh yeah. The Combo strips. It's time to attach those. I would recommend laying them out to make sure you have them going in the same direction all the way around OR at least the same way on opposite sides which is what I chose. (Scroll down to see what I mean as I forgot to take a picture of the layout. I know, sorry)
Starting with the sides, pin into place --- eyeballing the seams to make sure they line up with the seams on the other side of your inner border.
Sew the side borders on.
What do you still have left in reserves? Those A units that you made in the very first clue. They have been waiting a long time to be a part of the fun.
Attach one of those to each end of the remaining Combo Strips

Pin the upper and lower borders on, again matching the seams along the way.
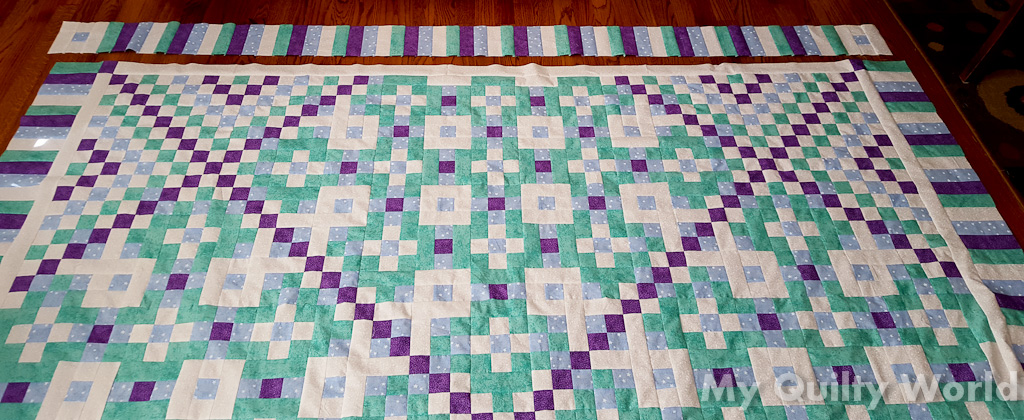
And your top is finished.

This is the part where I am scared to death. Honest. My head is saying, "Please let them like it" over and over again. It's also the part where I get to be honest with you finally. A few people know this, but VERY few.
The day before this started, I decided that I REALLY didn't like the top at all. Period. I had finished it and found some errors that MIGHT help it. After fixing those, I still wasn't sold. Neither was Mister. The pattern that I had designed had some serious issues BUT it was derived from an earlier pattern. At the last possible minute and just hours before the first clue was set to go live, we decided to go back to the original design. It was soooo similar that we crossed our fingers on the yardages I had given and set to work determining how many strips of each would need to be cut. As luck would have it, the A units were part of the original pattern too, so I had all the directions written and pictures taken. Whew. (So Penelope, we were back to the pattern I showed you MONTHS ago.)
At this point, I started to tear apart the first top. Yes, all that ripping that you read about in the blog and in the groups --- that was me taking my scrappy top back down to squares. I was barely staying ahead of all of you in tearing and resewing. BUT, I was loving how it was looking this go round.
I finished the scrappy one and while at retreat in September started the constant one so that I could see just how much of a difference color can make. I learned OH SO MUCH and that is why I admonished you all to stay within similar value ranges with your colors. As you can see below, in my scrappy top, it is not as easy to spot the secondary patterns. The main one is there. Also, because of using neutrals that were oh so scrappy, the ribbons sometimes get lost. I still LOVE it, but as I said --- learned so very much.
I was typing this on Wednesday night, the 21st, with clue 9 set to release on Saturday, the 24th. I had one week before retreat and my tops still needed to be quilted and bound. I guess it all happened because here are your final outdoor shots.
Front of constant:

Back of constant -- I used tidbits from the scrappy one for the center panel.

Front of Scrappy one -- see how my whites don't pop enough since I used prints? Lesson learned.

Back of scrappy one --- I may have to do another back like this again and pretend it is the front when it comes time to quilt it. Would look great with echo quilting of the back. Yes?

These came out at different sizes due to the amount of quilting used. The constant finishes at 84" and the scrappy one at 87 1/2". Amazing what that last step can do.

 One last thing before we call an end to this journey. With my constant top, I had exactly 2 1/4 blue, 5 green, and 3 1/2 purple strips left. I had 1/2 of a neutral one after the inner border. I used up ALL the end pieces as I went. With whatever mistakes I had made and remaining end pieces that were less than 2", I made my label for the back. That's it. Nothing else remained so the strip counts were pretty dang close.
I also cut 9 WOF strips for the binding and had about 15" left.
Again, thank you so much for playing along with me. HUGE thanks to Debi and Allison for being my editors and helping me through those painful moments. I owe you both big time.
For those of you who like to know what you have accomplished, here ya go: IF my addition is correct (and at 12:41 a.m. it may not be), you have 2,611 pieces in your top. Way to go.
PLEASE PLEASE PLEASE drop a comment on the blog so that I know you participated in this. I'd love to see finished pictures. They can be sent to ribbonsoflove@dhayter.com
Hugs,
Deb
I love it. Love love love it! Thank you! Thank you for sharing your life also. Many blessing to you.
ReplyDeleteYou are most welcome. It has been such fun for me to do this. Thank you for following it.
DeleteIt's friggin' A.W.E.S.O.M.E. and so are you and your message. You are loved you know!! Hugs, Allison
ReplyDeleteThank you so much my friend. I am still in awe of the people who were willing to take a chance on this pattern. You, being one of them. What fun it has been.
Deletei love this top!! I realllly do! Great job :))
ReplyDeleteThank you so very much.
Delete